
A Board Game Spinner is a simple device used in board games to determine player movement or actions. It typically consists of a flat, circular piece of cardboard or plastic with an arrow in the center. Players take turns spinning the arrow, and the outcome dictates their next move or decision within the game.
How To Make A Board Game Spinner? If you’ve ever wondered about creating your own custom board game spinner, you’re in for a fun and creative adventure. Making a Board Game Spinner can be a fantastic DIY project, allowing you to personalize your game’s mechanics and aesthetics.
Making a Board Game Spinner is a straightforward process that requires minimal materials and can be completed in a short amount of time. You’ll need common items such as cardboard, a brad, a paperclip, and markers. By following a few simple instructions and design tips, you can have your homemade board game spinner ready for action.
What Is a Board Game Spinner?
Before we dive into the creative process of making your own board game spinner, let’s start with a clear understanding of what it is. A board game spinner is a device used in various board games to determine player movement or actions. Typically, it consists of a flat, circular piece of cardboard or plastic with an arrow in the center.
Players take turns spinning the arrow, and the outcome of the spin dictates their next move or decision within the game. It’s a simple yet effective tool that can be found in a wide range of board games, and it often adds an element of unpredictability and fun.
How To Make A Board Game Spinner?
If you’ve ever wondered about creating your own custom board game spinner, you’re in for a fun and creative adventure. Making a board game spinner is a fantastic DIY project, allowing you to personalize your game’s mechanics and aesthetics.
Whether you want to design a spinner that matches the theme of your game or simply enjoy a hands-on crafting experience, this guide will provide you with the steps and ideas needed to bring your vision to life.
Materials Needed
Before you embark on your journey to create a board game spinner, it’s essential to gather all the necessary materials. Here’s a list of what you’ll need and a brief explanation of each item’s purpose:
Materials List
Cardboard: This will serve as the base for your spinner.
Brad: A small metal fastener that allows the spinner to rotate.
Paperclip: You’ll need this for the spinner arrow.
Markers or Paint: To customize and decorate your spinner.
Scissors: For cutting and shaping the cardboard.
Ruler: To measure and ensure accuracy in your design.
Pencil: For marking and sketching your spinner’s design.
Glue or Tape: To assemble and secure the parts of the spinner.
With these materials in hand, you’re well-prepared to start your board game spinner project. Let’s proceed with the step-by-step instructions to create your very own spinner.
Step-by-Step Instructions
Creating a board game spinner is a straightforward process, and we’ll guide you through it, step by step. It’s a hands-on project that doesn’t require advanced crafting skills, making it accessible to both beginners and experienced DIY enthusiasts.
Preparing the Base
Take a piece of cardboard and draw a perfect circle on it. The size of the circle will determine the size of your spinner, so choose a suitable diameter. Carefully cut out the circle using scissors.
Make sure the edges are smooth. At the center of the cardboard circle, create a small hole using a pencil. This hole will serve as the pivot point for your spinner.
Creating the Arrow
Straighten out a paperclip, leaving a small hook at one end.Bend the straightened paperclip into an arrow shape. You can create a traditional pointer arrow or get creative with your design. Ensure that the hook end of the paper clip can fit into the hole at the center of the cardboard circle.
Assembling the Spinner
Insert the hook end of the paperclip arrow into the hole in the cardboard circle. This creates the pivot point for your spinner.Take a brad and insert it through the cardboard and the hook of the paperclip on the other side.
Spread open the brad legs on the backside of the cardboard to secure the arrow in place. Your spinner should now be able to rotate freely around the brad.
Designing and Customizing
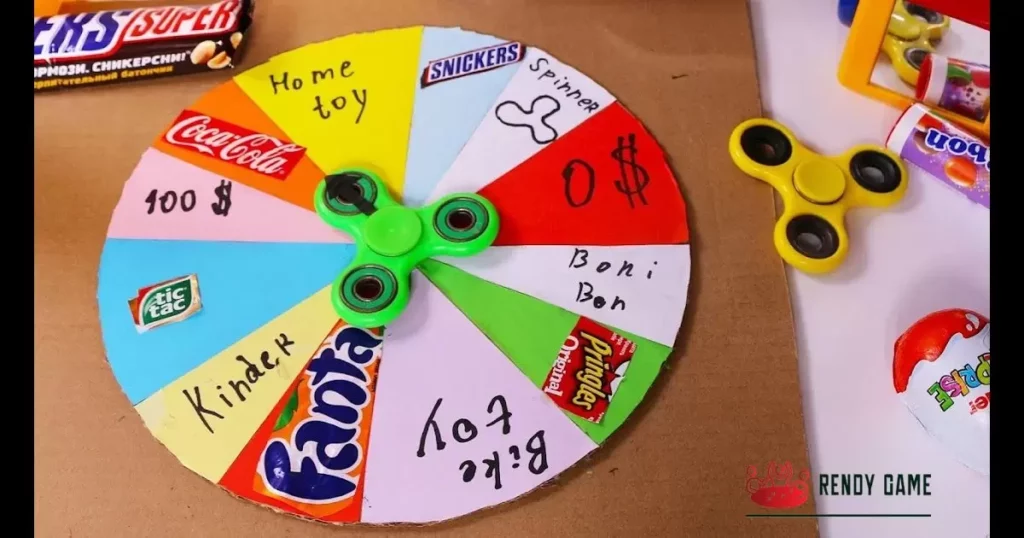
Use markers or paint to decorate the top side of the cardboard circle. This is your chance to add your own artistic touch to the spinner. You can create different sections on the spinner, each with a different color or symbol, to make it more visually appealing and functional.
Allow the paint or markers to dry completely before testing your board game spinner. With these steps completed, you’ve successfully created your board game spinner. Now, let’s explore some tips and design ideas to make your spinner truly unique.
Tips and Design Ideas
Here are some suggestions to enhance your board game spinner:
Suggestions for Customizing Your Spinner
Themed Spinners: Create spinners that fit the theme of your board game. For example, if your game is about pirates, make a spinner with a pirate ship design.
Numbered Sections: Divide the base of the spinner into numbered sections to indicate different outcomes. This is particularly useful for games that rely on numbers or statistics.
Color Coding: Use a color-coding system to represent various game elements. It can make the spinner more intuitive and engaging.
Double-Sided Spinner: Design your spinner to have two sides, each with different outcomes. This adds an extra layer of excitement to your game.
Creative Design Ideas
Spinners with Themes: Customize your spinner according to the theme of your board game. If it’s a space-themed game, create a spinner with planets and stars.
Storytelling Spinners: Add storytelling elements by including images or phrases related to your game’s narrative on the spinner.
Spinner for Educational Games: If you’re creating an educational game, design a spinner that incorporates educational symbols or questions.
Special Effects: Experiment with glow-in-the-dark paint or metallic markers to make your spinner visually appealing.
Testing Your Spinner
Before incorporating your homemade spinner into your board game, it’s important to test it to ensure that it works properly. Here are some ideas for testing your spinner.
Spin Consistency: Test the spinner’s consistency by spinning it multiple times to see if it consistently lands on different sections.
Durability: Family board games are a fantastic way to bring loved ones together, and it’s essential to check the durability of your spinner by spinning it numerous times to ensure that it remains intact during the game night
Game Integration: Test your spinner within the context of your board game to verify that it adds the desired element of chance and excitement.
Spinner Design Ideas
| Spinner Design Ideas | Description |
| Themed Spinners | Design spinners that match the theme of your board game, making it more immersive. |
| Numbered Sections | Divide the base into numbered sections for clear game outcomes, especially for numeric games. |
| Color Coding | Use colors to represent different game elements, adding visual appeal and clarity. |
| Double-Sided Spinner | Create spinners with two sides, each with different outcomes, for added excitement. |
| Spinners with Themes | Customize your spinner to reflect the game’s theme, whether it’s about pirates, space, or more. |
| Storytelling Spinners | Incorporate images or phrases related to your game’s narrative for a storytelling element. |
| Educational Spinners | Design spinners with educational symbols or questions for educational board games. |
| Special Effects | Experiment with glow-in-the-dark paint or metallic markers to enhance the spinner’s appearance. |
FAQs
Can I use different materials for the spinner base?
Yes, you can use materials like plastic or even wood to create your spinner base, depending on your preferences.
What types of games can benefit from a homemade spinner?
Homemade spinners work well for a wide range of games, including educational, thematic, and games that require chance elements.
Is there a specific size I should aim for with the spinner?
The size of your spinner can vary, but a standard size is typically around 4-6 inches in diameter.
Can I make spinners with more than one arrow?
Yes, you can make spinners with multiple arrows for more complex outcomes or choices.
How can I make the spinner more durable?
To enhance durability, consider applying a clear sealant over the top, and ensure it dries thoroughly.
Conclusion
Making your own board game spinner is a rewarding and enjoyable DIY project. It allows you to infuse your games with a personal touch and adds an element of fun and chance. With simple materials and a bit of creativity, you can create a spinner that not only serves its purpose but also enhances the overall gaming experience.
The next time you gather around the game board, you’ll be using a spinner that’s uniquely yours, making the gameplay even more memorable. Don’t hesitate to start your DIY project and embark on a creative journey in the world of board games.